
Use In Vehicle Test to perform Battery Tests on in-vehicle single 12V batteries. A System Test with an optional Amp Clamp is also available.
| NOTE: An In Vehicle Test test will always associate the in-vehicle battery with the Vehicle ID of the vehicle in which it is installed. |

Battery Test
1. Connect the Tester Pod test clamps to the battery and remove the Controller.
| NOTE: For any reoccurring issues with the Controller connecting to the Tester Pod, and the Tester Pod is connected to a <9.5V battery, replace the Pod’s 6 AA batteries. |
2. On the Controller at the Main Menu tap Single Battery Test. The Vehicle ID screen is displayed.
3. Vehicle ID: Use the on-screen keypad to manually type the Vehicle ID number and tap Next.
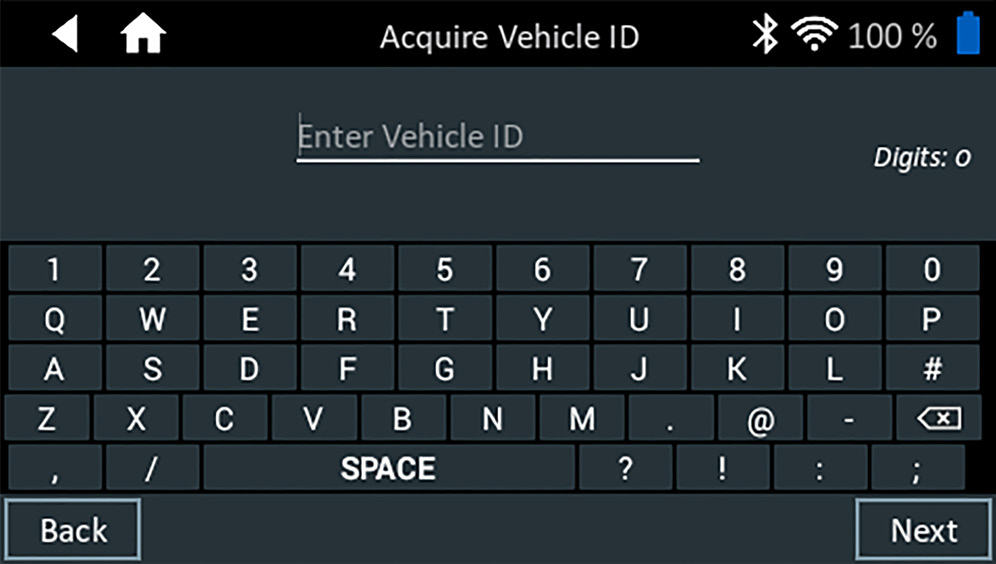
The displayed digit counter will count up the alphanumeric characters as they are being entered on the keypad.
Use Manual Entry if the battery being tested is not listed. Tap > to continue to the Edit Battery Information screen.
4. The Edit Battery Information screen displays vehicle and battery information. If the displayed information is correct, tap Next to begin the Battery Test. Tap on the corresponding box to edit the parameter information.
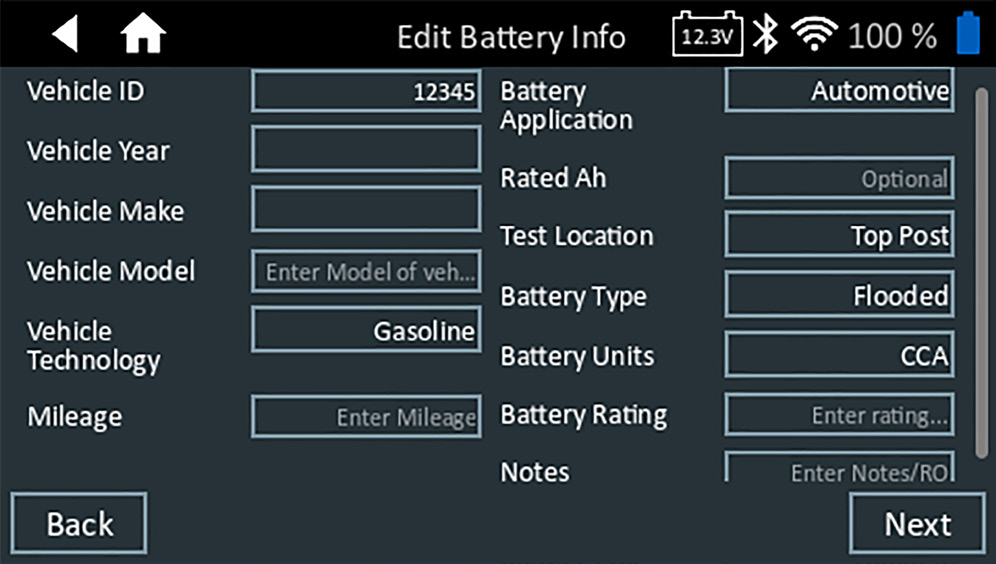
| NOTE: If no Reserve Capacity/Amp Hours value is entered, the analyzer will use the average RC rating for a flooded Group 31 battery (180 minutes). |
| NOTE: See Instruction Manual, Appendix B for test parameter descriptions.. |
5. Align the temperature sensor on the Controller over the battery and tap Capture. The test begins when the temperature is successfully captured. The test results are displayed on the Controller screen.
| NOTE: See Instruction Manual, Appendix A for possible test result descriptions. |
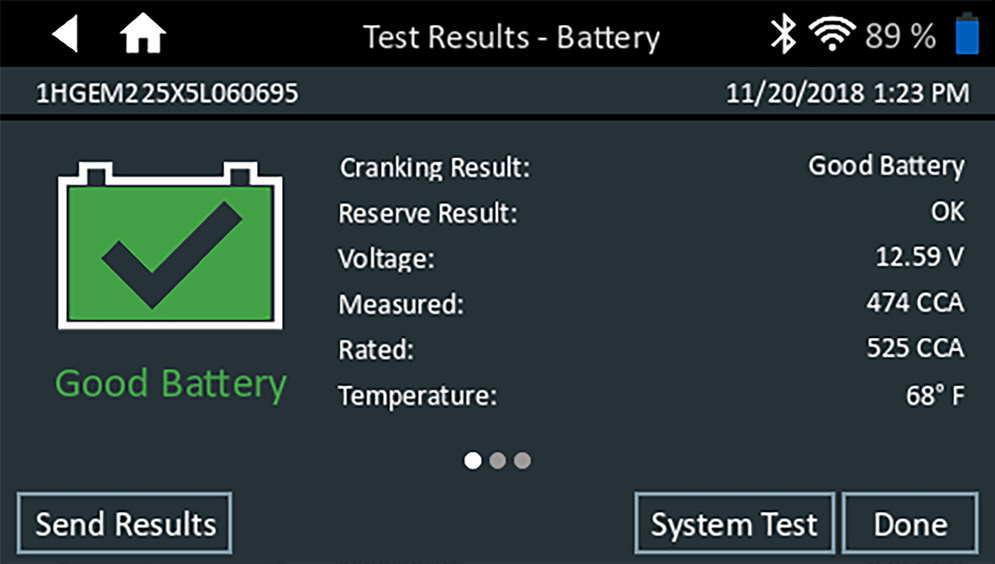
Battery Test Results
The test results are displayed on the Controller screen.
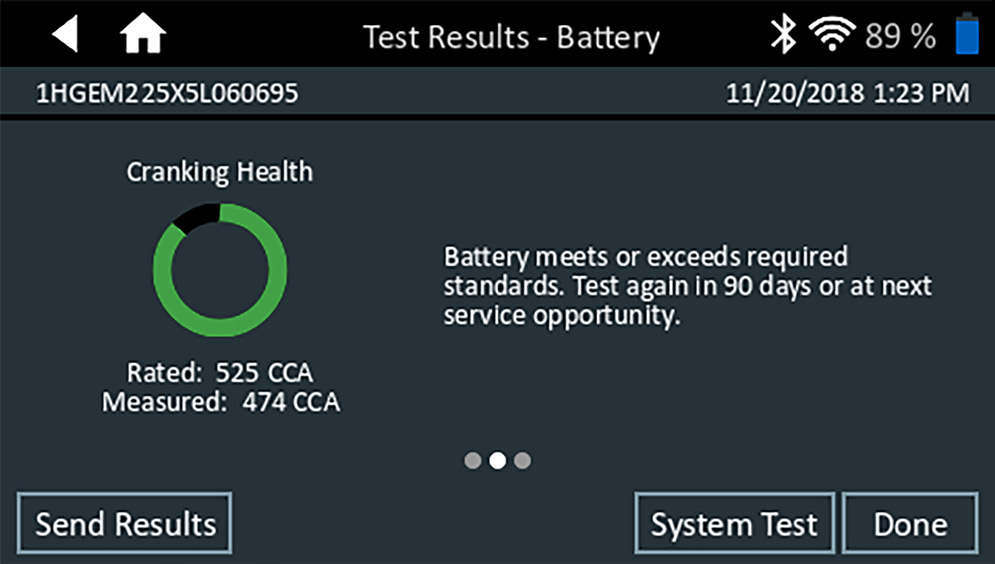
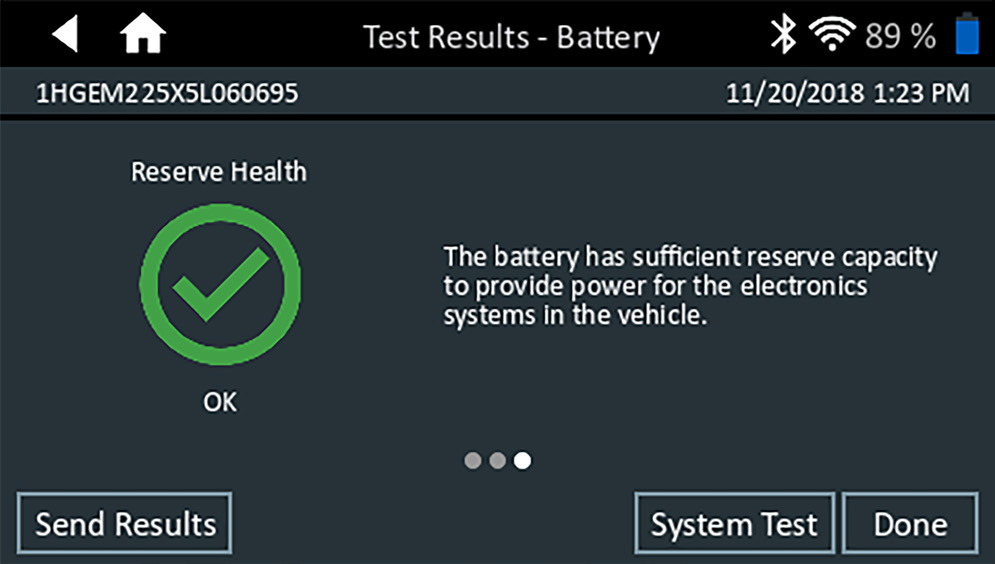
| NOTE: See Appendix A for possible test result descriptions. |
To print or send the test results to a configured printer tap Send Results. To return to the Home Screen, tap Done or System Test to continue with the System Test.
System Test
1. If available, connect the optional Amp Clamp to the Tester Pod and hold the clamp away from any cables with the jaws closed.
| NOTE: If the Amp Clamp is not being used, begin the System Test at Step 4. |
2. Tap Next to zero out the clamp or Skip if the Amp Clamp is not being used.
3. With the engine and electrical loads off, place the Amp Clamp around the negative (–) battery cable and tap Next.
4. Start the engine and let it idle.
5. Turn off all accessory loads such as the headlight high beams and ventilation blower fan.
6. Tap Next. The analyzer tests the alternator output.
7. When prompted, rev the engine to between 1000 to 1250 rpm and hold it there while the analyzer tests the alternator output again.
8. Tap Next.
9. When prompted Idle the engine.
10. Turn on the high beam headlights and ventilation blower motor.
11. When prompted, rev the engine to between 1000 to 1250 rpm and hold it there while the analyzer tests the alternator output again.
12. Tap Next.
13. Turn off the high beam headlights and ventilation blower motor.
14. Return the engine to idle, then shut it off.
15. Tap Next to display the test results.
Test Results-Summary
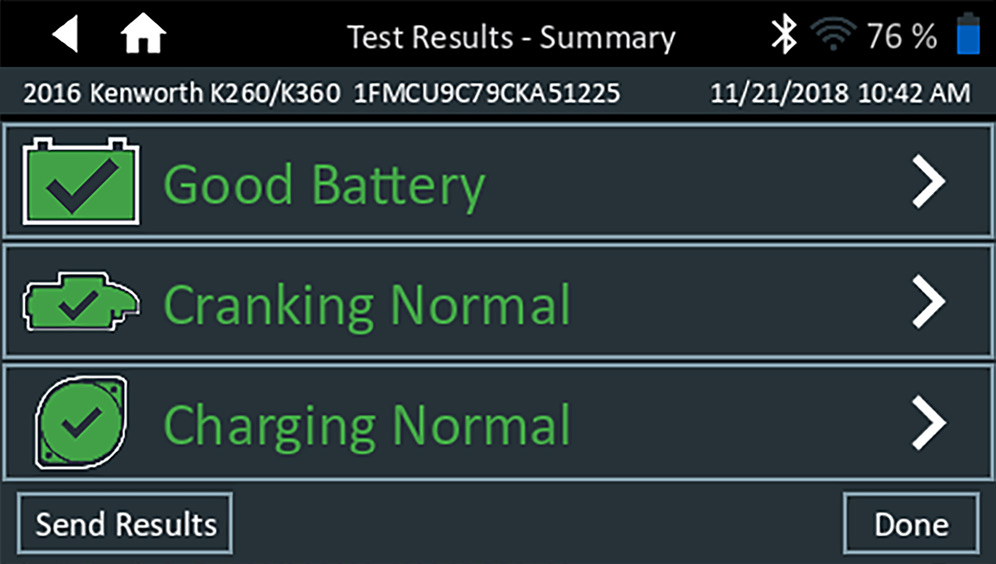
A Test Results – Summary screen is displayed following a System Test. Tap > to view detailed test results for each part of the test.
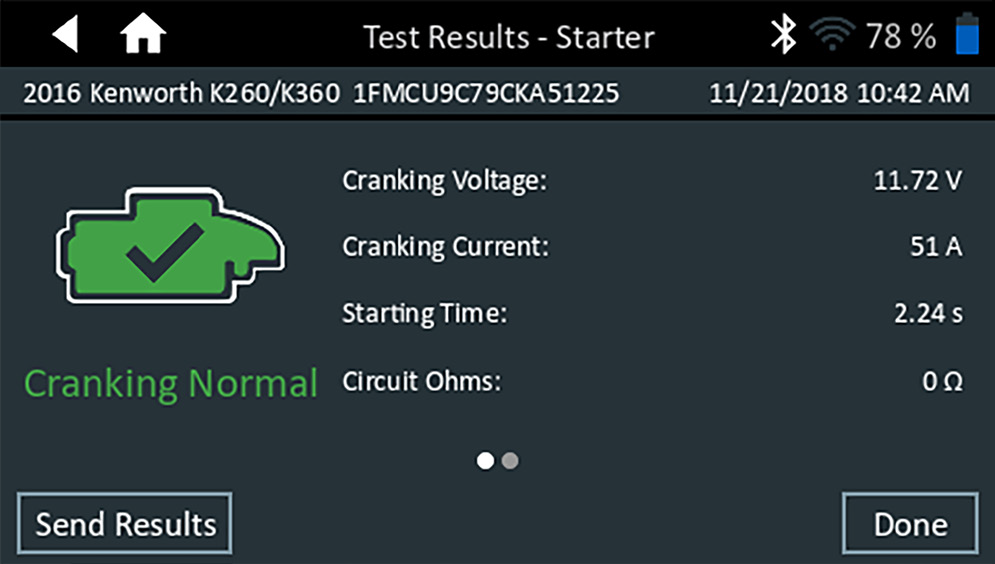
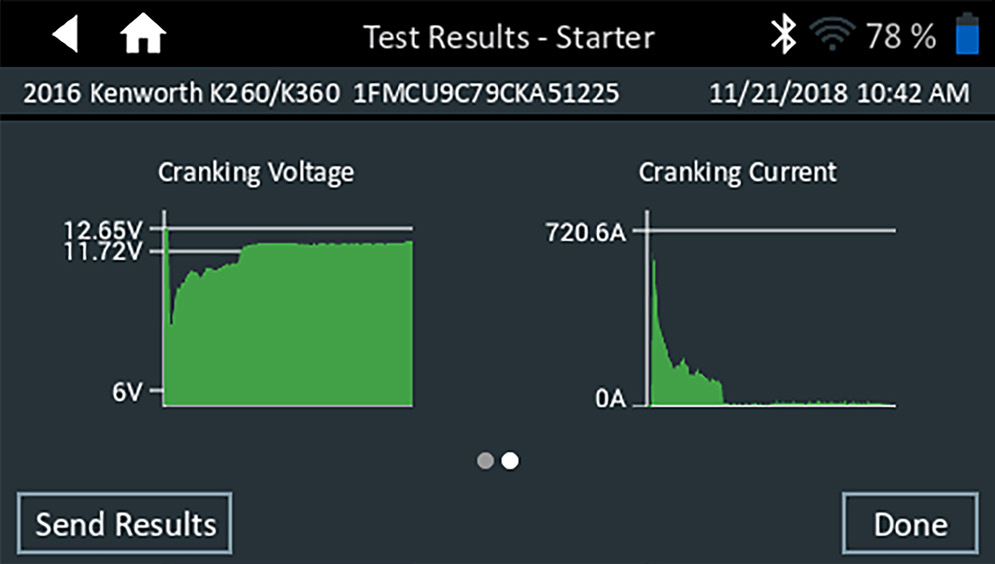
Starter Test Results
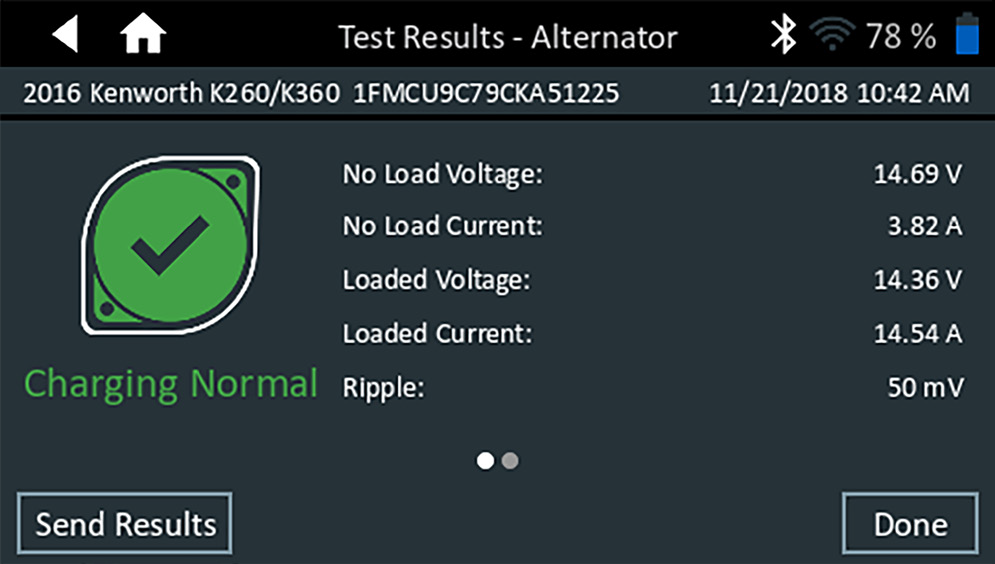
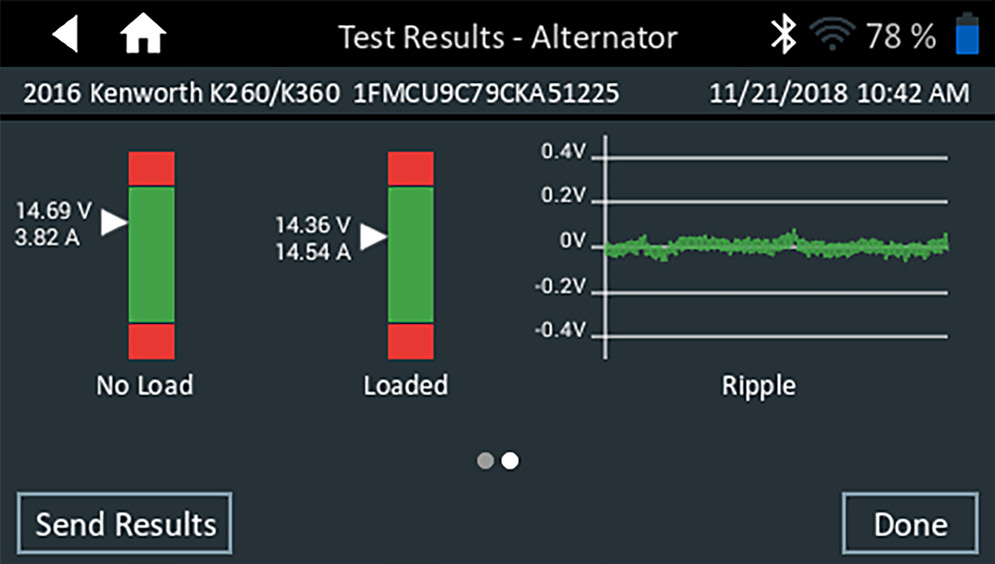
Alternator Test Results
| NOTE: See Appendix A for possible test result descriptions. |
To send the test results to a configured printer or via email tap Send Results. To return to the Home Screen, tap Done or Home to return to the Main Menu.